
WHAT IS RELIEF PRINTMAKING?
In relief printmaking, the printmaker cuts and gouges the surface of a flat block using sharp tools, removing all areas intended to be ink-free or remain white in the print. The rest of the areas stand at their original level to receive ink from a brayer. The ink is transferred to the paper by applying pressure either manually or with the aid of a press. This primary method is applicable to all relief printmaking mediums.
The Far Eastern ‘Moku-Hanga’ technique
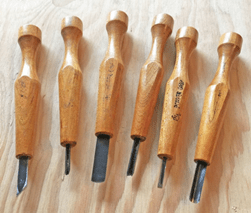
Traditional woodblock printing techniques in Japan have remained unchanged for centuries. The woodblocks are made from cherry or sakura. It requires at least two years of seasoning. The surface of the wood is polished using a sharp whetstone. The design is then transferred to the surface using nori paste,a sticky substance made from boiled rice. The Japanese woodcut tools include a knife, ‘V’-shaped gouge, round gouge, flat chisel, long round chisel, and a clearing chisel. In Moku-Hanga, water-based ink is applied to the block using a brush. Ink is prepared from organic and inorganic substances. The key block or black is printed first and then gradually the other colours are printed one after the other.
Western technique
In the Western technique, a brayer is used to apply oil-based ink to the block. Western relief printmaking is categorized into three different mediums: Wood Engraving, Woodcut, and Linocut. Other materials appropriated for the matrix are boards, plaster, cardboard, etc. The preparation of the matrix is similar for all relief techniques, albeit each has its unique characteristics.
Engraving on wood allows for a much more realistic image. It aids an artist in creating minute details on the woodblock’s surface. Wood engraving is done on a piece of cross-sectioned wood. Such as Box, Pear, Lemon, and Hornbeam wood. Among them, boxwood is highly regarded. Wood engraving tools are called graversor burins. Its mushroom-shaped handle assists in gripping the tools against the palm during engraving. Four different types of burins are used in wood engraving: tint tools, spit sticks, gravers, and scrapers.

Woodcut and linocut, on the other hand, are similar to the Japanese woodcut. A woodcut is done on the plank, which is the side grain of a piece of wood. Wood has directional grain and does not have the same cutting freedom as linoleum. Linoleum is flexible, invented by Englishman Frederick Walton with a mixture of linseed oil, pine resin, ground cork dust, wood flour, and mineral filters such as calcium carbonate. It was used mainly for floor covering. In the 20th century, the German Expressionists and Pablo Picasso used linoleum as an alternative to plywood. Because of its flexible nature, linocut is also called Flexography. Flexography means obtaining the print from a flexible matrix.


Boxwood and Linoleum
MAKING A BLACK AND WHITE RELIEF PRINT
Materials required:
Wood/linoleum cutters, rubber roller/brayer, letterpress ink, purified linseed oil, sheet of glass for rolling ink, spatula, heavy spoon/round glass paperweight, turpentine/kerosene oil, fresh cotton rags, newsprint paper, texture free lightweight paper, pencil, black colour, brushes, black marker etc.
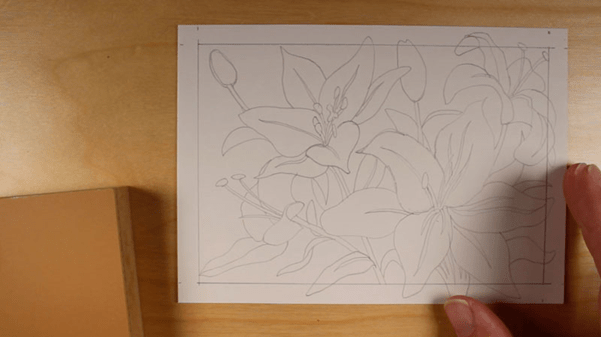
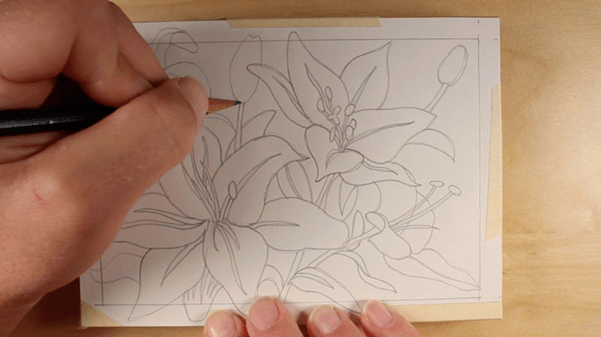
Layout and drawing on the block:
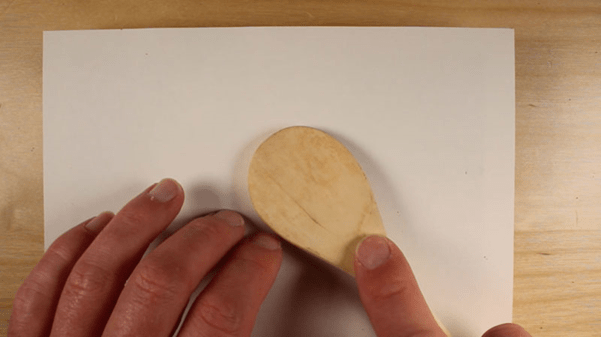
The first step in relief printing is to prepare a layout. Take a piece of white paper the same size as your block. Draw on the paper using a pencil. Fill in the areas that will be printed in black with water-soluble black colour or a black marker. After finishing the layout, turn the paper around and trace it on the block using transfer paper.
Preparing the block:
Relief Printmaking and drawing are not the same things; in drawing, the drawn line is the pictorial area, whereas in relief printmaking it is the opposite. Because of the depressed surface level, the engraved line will appear white in print. However, if engraved on both sides of a line, a black line will emerge.
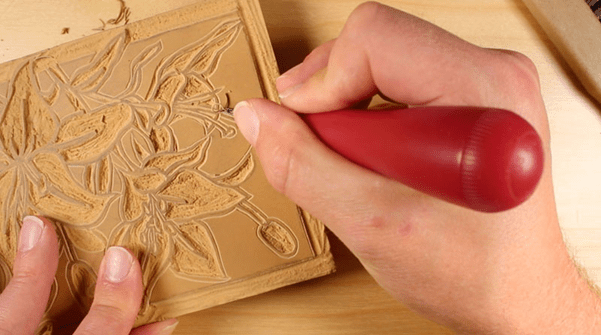
Remove all the white areas intended to be ink-free or remain white in the print using the tools. To engrave properly, the tool must be held correctly. Grab the tool with your writing hand in such a way that the tool extends beyond your index finger and thumb to guide and control it in the appropriate direction. To prevent the block from moving, both hands should work together. Usually, one hand holds the block while the other is for engraving.
For cutting variations, the nature of each tool must be understood. Deep and thin lines are cut using various size ‘V’-shaped tools, whereas large areas and textures are carved with different ‘U’-shaped tools. The knife is used to cut the outline of a shape or form.
Inking the block:
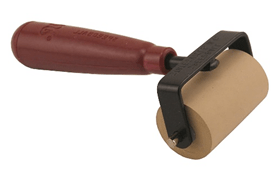
The first step in printing is to prepare the ink. Using a spatula, put some ink on the glass, add some linseed oil and thoroughly mix it; the ink must be in a stable state, not too loose or too tight. Apply some prepared ink on the glass with a spatula and roll it with a brayer until the ink forms a thin uniform layer. Roll the brayer over the block in both horizontal and vertical directions thoroughly. Do not add excess ink at the first attempt, otherwise, it will cover some of the lines on the block. It is advisable, to begin with, a little amount of ink and gradually increase the amount.


Printing
Before proceeding to the final print, a trial printing or proofing is required. Some artists take proofs at various stages of the engraving process to ensure progress, while others prefer proofing after the completion of the engraving.
Registration is required to ensure that the block does not shift throughout the printing process. Mark the outline of the block on a white plain board, then attach a piece of thick cardboard to the outside border of the indicated registration line.
Put the inked block on the registration. Place the printing paper on the block and rub it with the back of a heavy spoon or with a round-shaped glass paperweight.
Check the proof for any necessary corrections, and take another set of proofs. If the result is satisfactory, start taking final editions.
To clean the block, use newsprint to remove excess ink, and cotton rags dipped in turpentine or kerosene oil to remove any leftover ink.

Reference
https://thevirtualinstructor.com/reliefprinting.html
By Nilanjan Das
